
Fleet Registration [FDC014]
Use this help to create, edit or delete fleets from the database.
Note: Before creating a new Fleet, make sure no other user has already registerred the Fleet you desire by searching the database with key words that could describe the Fleet you wish to register. For help on how to search existing fleets, click here.
How to:
To access this function: Fleets

To create a new Fleet:
1. Click on the Add button 
2. Enter all of the fields with information as accurately as possible. See field descriptions below if necessary.
3. Click on the Save button 
To edit an existing Fleet:
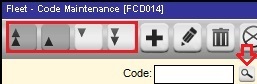
Note: If you know the code of the Fleet that you want to edit, you can type the code in the Code field  located at the upper right side of o the the screen and then click the shortcut button. Also If you make a mistake before you save and you want to start over you can click the cancel button
  to bring the data back to its previous state.
1. Click the Find button next to the Fleet Code field, then select the Fleet you wish to edit.
2. Make the necessary changes to the data on screen.
3. Click on the Save button
To print a list of the existing Fleets:
1. Click on the Print button. 
2. If desired change the desired output format of the report. PDF is the default format.
3. Click on the Process button. 
To delete an existing Fleet:
Note: Only Admin or Master users have the access rights to delete fleets from the database. Deleting a fleet will also automatically delete every inspection made by any user of the system associated with that fleet, its branches and vehicles. Deleted records cannot be undeleted and will no longer appear on any reports. Use this option with extreme caution.
1. Click the Find button next to the Fleet Code field, then select the Fleet you wish to delete.
2. Click on the Delete button. A couple warning messages will appear, allowing you to proceed or cancel the operation.
More about this function:
For the Survey Web application, a Fleet is the company that owns the vehicles you will be inspecting. In this system a Fleet can have many Branches, but it must have at leaset one Branch. The Branch Registration must occur after the Fleet Registration.
A Fleet's Vehicle's are ultimately linked to a Fleet's Branch. A Fleet's vehicles cannot have duplicate numbers, even if the vehicles belong to different Branches.
If a Fleet has a single location, the Branch configuration should be identical to the Fleet Configuration.
If a Fleet has multiple locations, the Fleet configuration should be their headquarter's information, which may be the same information as one of the Fleet's Branches; and the number of wheel positions should be the reflection of the fleet as a whole, including all of its Branches.
The Fleet Information can be updated at anytime, and the total number of wheel positions may change from time to time. If you do not know the exact number, you may estimate it as this number is used only for projection purposes.
Field Descriptions:
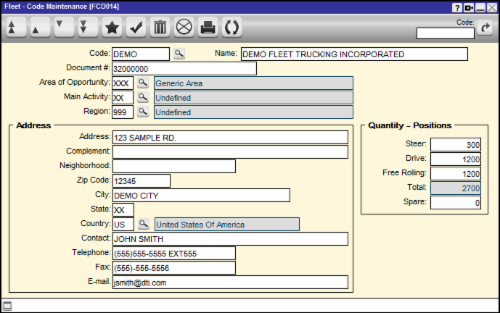
Code: This is the fleet code, it can be up to 8 alphanumeric caracters in lenght. Do not use spaces or symbols. The fleet code should represent the fleet's identity and be easy for others using the system to quickly locate the fleet based on this code.
Fleet: This is the Fleet for which you will create, edit or delete the Branch.
Name: This is the full business name used by the Branch.
Document #: This is a number that is unique to the fleet, such as the CRM number.
Area of Opportunity: An optional property of the Branch code. If no area of opportunity is assigned, leave it as XXX- Undefined.
Main Activity: This is the main vocation of the vehicles assigned to that Branch.
Region: This is the region in which the Branch is located.
Address quadrant: Branch’s address and contact information.
Quantity – Positions quadrant: This is the number of wheel positions the fleet has for each axle type.
[This document was last updated on 07/02/2014]